This is my first Mach 1, it is a 1971 M-Code I got in August of this year, I finally found a 1971 Mach 1 I was looking for, yellow medium gold, 351C with a 4 speed and Ginger interior. Although it did not have the Ram Air option I really wanted. I got it for a really good price from one of the nicest sellers I have ever met. It came with a 351C that has Trick Flow aluminum heads, Edelbrock RPM airgap intake, big cam, 9.93 gears, MSD ignition and Holley Brawler 750 carburetor. The seller also had the original matching number 351C rebuilt which I shipped to my shop. I have bought all new interior for it, and I am painting the trunk with spatter paint and spent a lot of money on suspension parts because this is going to be my road race fun/race car. Test and tune days, amateur days and every year for the Annual Mid-American Mustang and Shelby meet in June.
Items purchased and installing.
- Removed window washer reservoir to move the MSD Ignition there. COMPLETED
- Adding K&N Air filter (it’s on backorder believe it or not) First one I bought was from Amazon that said it would fit my car, but it was 1 inch too short. COMPLETED
- New carpet for front and for the back. Purchased
- New seat covers for front and back seats Purchased
- New door covers. (make note you must buy the door handles, and the arm rest holders as well, the door panel inserts woodgrain and the small thin chrome piece that goes across it separately) Purchased
- Replaced missing door lock on passenger side and the missing cigarette lighter knob Purchased
- New dash pad and new speaker that goes in under the dash. Purchased
- New headliner (Make note you must remove the back window to replace the headliner. Purchased
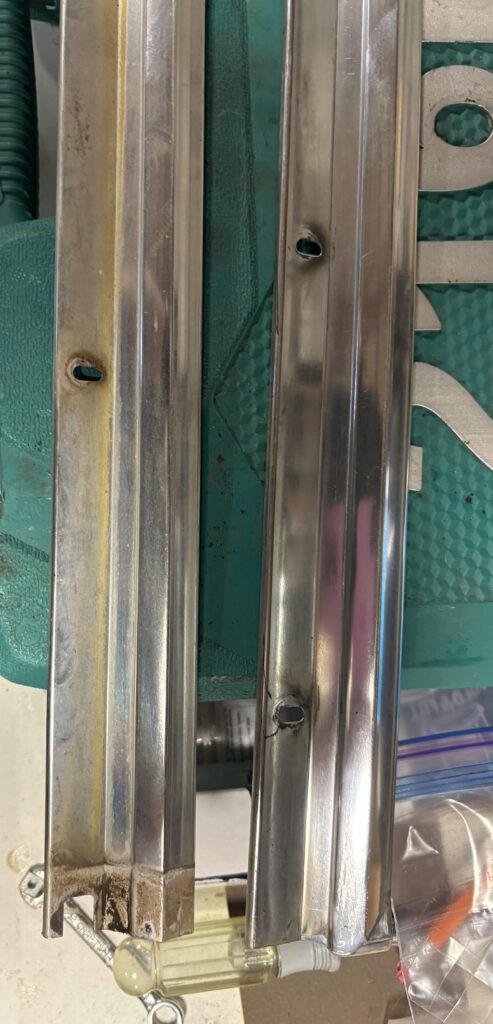
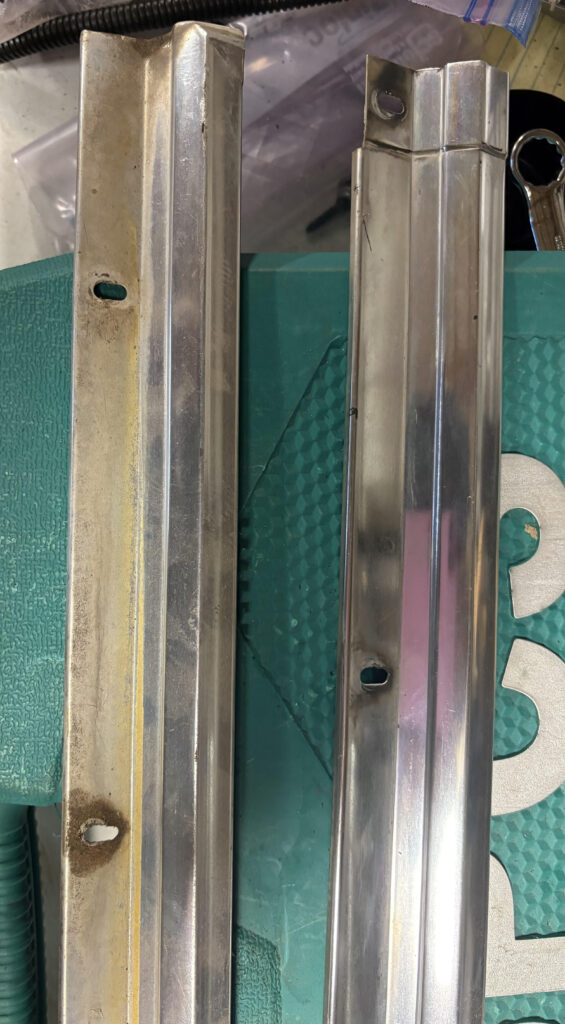
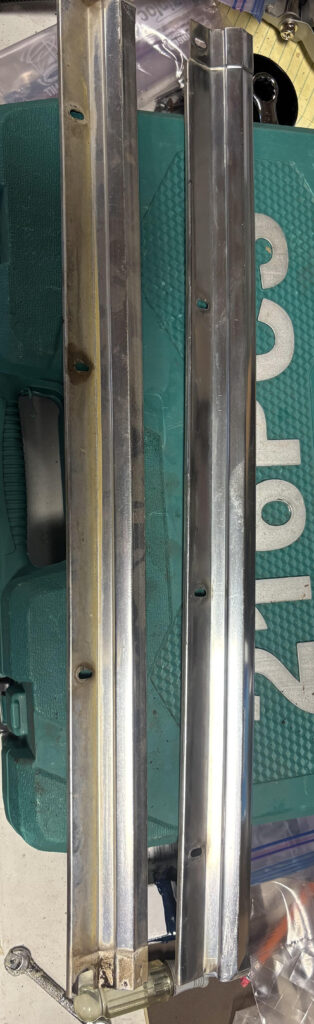
- New chrome pieces that go where you step in the car, if i learned how to use my dads chrome machine then I would not have bought these because that wheel and product makes chrome look brand new. Purchased
- Weatherstripping for doors, trunk and back window. Purchased
- New hood pin set COMPLETED
- New antenna Purchased
- 1″ front sway bar Purchased
- 3/4′ back sway bar COMPLETED
- Prothane total bushing kit Purchased Rear installed
- QA1 single adjustable shocks. For the front and rear (you can adjust them for road racing, drag racing or comfort) Read Installed
- Coil Spring Saddle High performance (make sure you buy two, they do not come in a set) Purchased
- Leaf springs 5-leaf, stock height, better performance INSTALLED COMPLETED
- Bought a straight monte carlo bar but it does not fit and they do not make a curved one (Do not buy one even though they say they are for a 71-73) the distributor is in the way by at least 3 inches across and several inches too in height. You cannot return it because the return cost more than the $45 dollar bar itself. You must go with a more expensive Triangle Shock Tower Bar. Dropping off at an engineering shop on Monday.
- Trunk Spatter paint, (YouTube video shows how to redo your trunk) COMPLETED
- Retro Mustang Radio INSTALLED
- Shock tower to fire wall chassis brace Purchased
- New front passenger side floorboard Purchased
- Homemade kit for cooing brakes Nearly complete
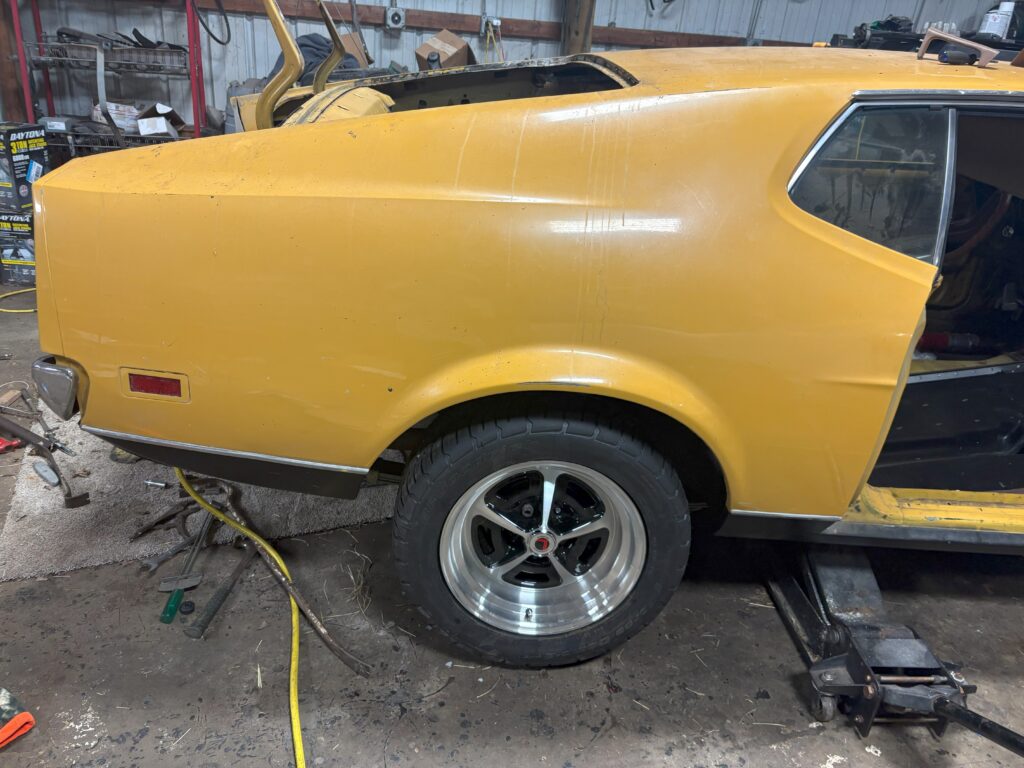
- New Mag 500 16×8 wheels for road racing only Legendary Wheel Magnum 500 Charcoal Machined Wheel; 16×8; 0mm Offset (64-73 Mustang)
Item #: EK-44-908 Needs longer studs - New braided fuel line to complete it and remove the parts that are rubber while moving the fuel filter at the back near the tank. Partial installed
- Bought new Hooker Headers and sending them off for ceramic dip. Still need to send off to have it ceramic dipped.
- BF Goodrich g-Force Comp-2 A/S Plus 245/50R16 97W BSW Installed on Wheels


The interior is Ginger which goes perfect with the Medium Yellow Gold paint. I purchased and I am installed, carpet for the front and the back, new seat covers for the front and back seats covers, new door covers, dash pad w/new speaker, headliner.


Working on the trunk, it was completely covered in gunk and took a special chemical to get it has much as possible up and a wire brush. It will be primer and then sprayed with a Trunk Spatter Paint. The paint is water soluble so you can add about 10 percent water to help it thin out so it will spray better. I purchase a cheap about $70 sprayer from Harbor Freight. I will reuse it for the other Mustangs. I have new weatherstripping for the trunk and I also purchased the spare tier bolt to hold it in place as it was gone and I ordered a new factory sticker for the trunk,
The trunk is finished, after scapping away as much oil and gunk as possible and using the special acid chemical then we primed it and sprayed it with the trunk spatter paint which is how the trunk on the mustangs for these years came.


Removed seats and trim and just about everything except for the carpet, you have to have special star shaped tool to remove the seat buckets.

This is not the stock motor. I have the stock motor that everything has been rebuilt, and I am storing it. We have estimated that this motor has close to or at around 400 horsepower. Notice where the MSD is located, it is being moved where the window water reservoir is located. These hoods are so long you must oil the hinges or could bend your hood and ruin it so keep it oiled often and careful opening and closing it. Since this is going to be my road racer I was going to add the ram air kit but because I have the Edelbrock RPM air gap intake there is no room. The intake is too tall for it. I will have to figure out how to bring in colder air. According to Holley, its all about the temp of air coming in and the important is using a K&N air filter. Their book on super tune and modify Holley carbs says that no other brands come close to K&N air filter. Bringing in air that is under the hood is too hot for their carburetors. I recommend getting their book/magazine which is everything you need to know how to find tune your Holley.
Hood Pins
The hood pins someone had put on there before were rusted screws so bad I had to drill one out, they were the wrong screws anyways. I bought the correct American screws and bolts and a whole new kit.


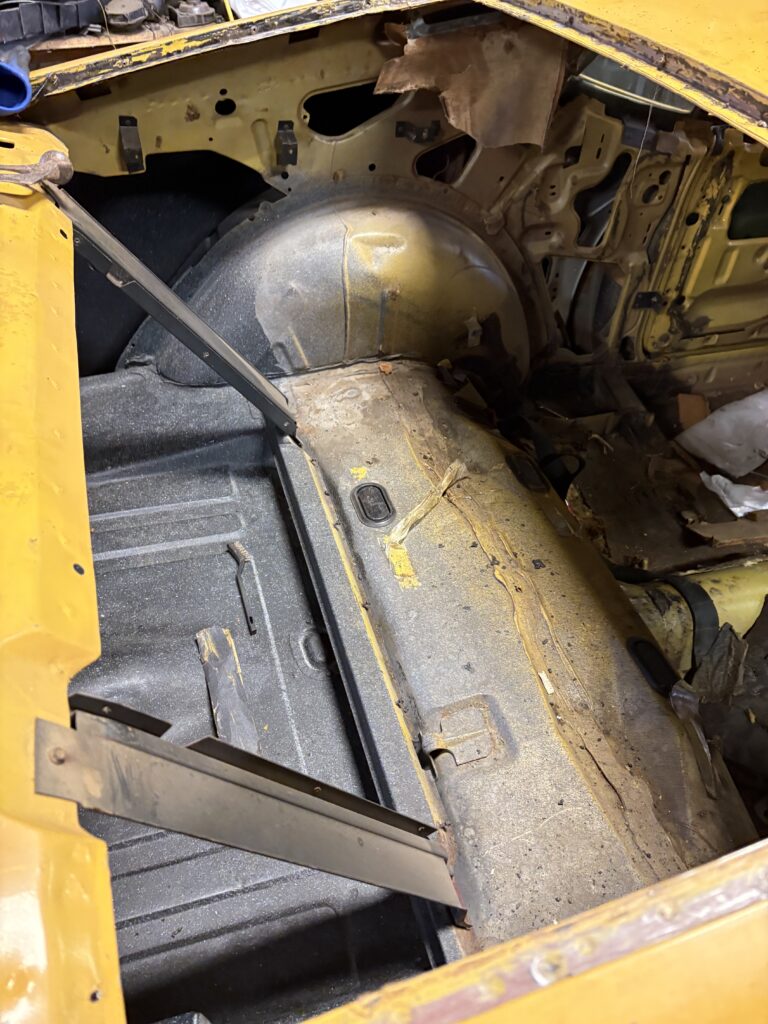
When I pulled up the carpet on the passenger side I found rust and a hole.

I odered a floor board that is just for that area and I am going to plasma cut the floor board and the new piece and weld it goether. Takes anout 3 hours of work.
I started the fold down deck carpet, so far I just had time to do the one.


As you can see my complete one on the left and the carpet I removed on the right. A;lways buy your carpert for your interior at the same time. The come bigger so you have to cut down to size, i use the old one as a tmeplete.
I finished all carpet on all decks. I will add the gallaery herer.


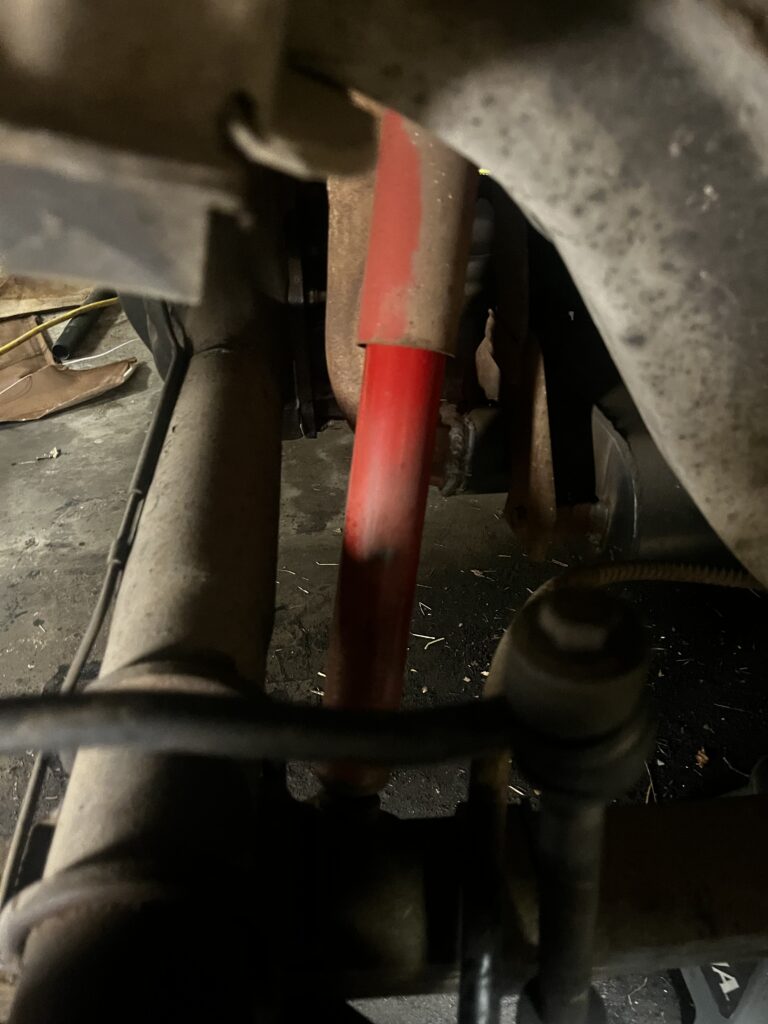
Mounted MSD, working on installing shock tower brace and replacing the section of rubber fuel line with a branded.


I installed my MSD where the window resivor which I keep all my original parts.
Trunk progress, removing weatherstripping, removed back window to install headliner.


I read where is not easy getting 50 plus years of weathershiping and gunk/glue. i have spent hours but it is coming together. I am painting the trunk area as well since were going to have it apart.
I started on the rearend with my nephew Jacob, he is only 17 but he is very good with his hands and cars.
So far we have jacked up the readend and working on getting the back sway bar off. I was shocked how small it was it and im glad I got the 1 inch compared to about the 1/4 sway bar. While the rear end is off, im mounting my fuel filter close to the new gas tank. I also have a complete kit of bushing repplacing which can see overwhelming when you have no instructions but I have some books that will help. I will also be mounting the new leaf springs and the air ducts for the rear brakes my nephew and I designed together. I will sell it as a kit eventually.I will add photos tomorrrow.
My nephew Jacob stayed up until 3 am installing the QA1 Bacj Shock Single Adjustable Mustang 1971-1973. These are about $240 each but well worth. They have about 18 setting, Comfort – Drag = Road Race, I got them for road race which is what this Mach 1 is going to be be for fun road races at local speedways.


Now were trying to get off the sway bar which is being a pain. I was surprised to see the stock sway bar looks to be a 1//4 inch and my 1 inch I bought for it is really going to help. We are also working on installing the new leaf springs and the all new bushing kit. Well since my accident I cannot do much so its my nephew doing the major stuff.

Completed installing the new 5 layer leaf spring, the new 3/4 sway bar (BTW it does not replace the old one, you must do some drilling and its a tough fit with the gas tank there. Good luck to anyone doing it. BTW you can keep the tiny old one on but its so small and it would make things even harder to put the better one on. I painted by wheel/brake blue. You will not see much of it but a little with my new mag 500’s. Now its time to do the driver side.
New MAG 500 Retro Wheels and Road Racing Tires

MAG 500 16 X 8

BF Goodrich g-Force Comp-2 A/S Plus 245/50R16 97W BSW ($196.99/each)
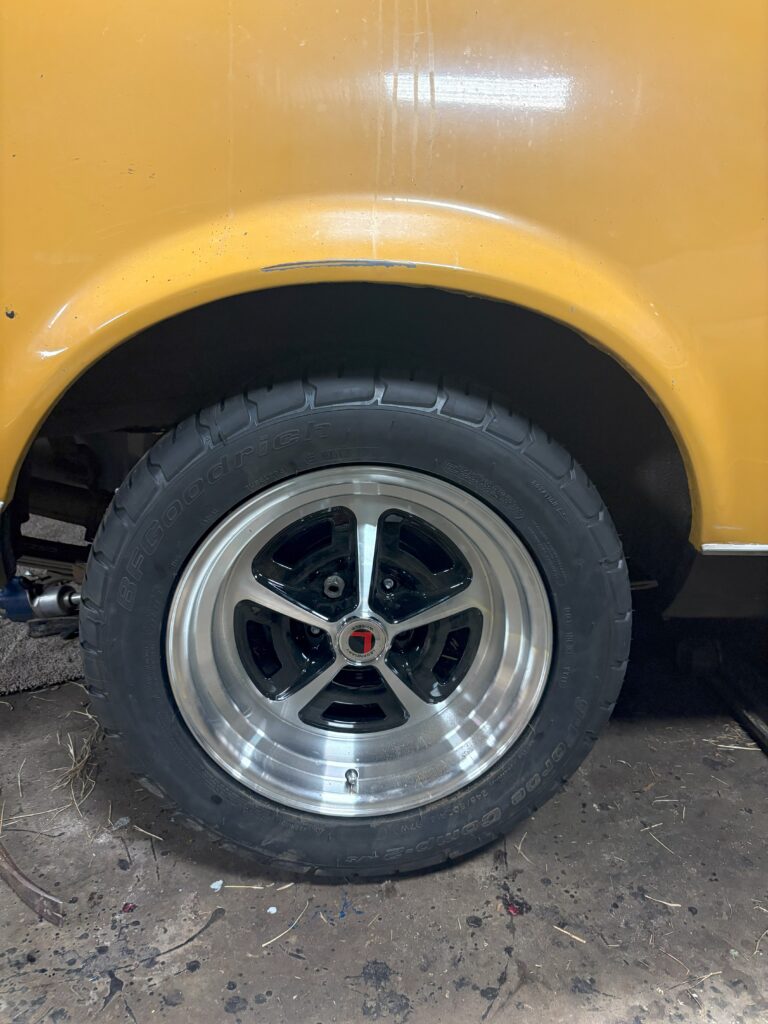
I have to get longer studs to fit the new wheels.
04/28/2025 Cleaning Chrome
I have a wheel that spins and you use this green type of chalk that brush will absorb then you run your chrome pieces and it works incredibly great. It saving me hundreds if not thousands as all my trim pieces that are 50 plus years old are dull. You can the difference on these photos on which one I worked on today.